Friday, November 11, 2016

Ripping 3D Blu-ray Main Title in 3D Effect

Summary: 3D Blu-ray movies are getting more and more popular nowadays. That leads to oversell of 3D Blu-ray discs. Considering that 3D Blu-ray discs might get damaged due to frequent insert-and-eject in disc drive. 

Many seasoned computer 3D Blu-ray fans choose to copy their 3D Blu-ray movies to computer for safe storage and protection for 3D Blu-ray disc. But to Mac users, 3D Blu-ray backup in 3D effect on Mac has been having a long way to go, especially after the release of the newest Mac OS X 10.11 El Capitan. General 3D Blu-ray Rippers can’t be compatible with OS X El Capitan. So this takes more difficulty to copy 3D Blu-ray main title in 3D effect on Mac OS X El Capitan. We tests many 3D Blu-ray Ripper on Mac on the market, and finally find two excellent 3D Blu-ray Rippers that work well on Mac OS X El Capitan. One is Pavtube BDMagic for Mac and the other is ByteCopy for Mac.

Then, the following will show some simple steps of copying 3D Blu-ray on Mac OS X El Capitan with these two excellent 3D Blu-ray Rippers.

Using BDMagic to copy 3D Blu-ray main title in 3D effect on Mac OS X El Capitan

Pavtube BDMagic for Mac is a user-friendly and handy tool for Mac OS X El Capitan users to rip and copy 3D Blu-ray main title in 3D effect, 2D Blu-ray and convert Blu-ray ISO on Mac OS X El Capitan with simple operations keeping original video quality. It not only can copy 3D Blu-ray with perfect 3D effect, but also convert 2D Blu-ray, Blu-ray ISO file to 3D MP4/MKV/AVI, etc.

Free download and install: 


Other Download:
- Pavtube old official address: http://www.pavtube.cn/blu-ray-ripper-mac/
- Cnet Download: http://download.cnet.com/Pavtube-BDMagic/3000-7970_4-76177782.html

Step 1: Load 3D Blu-ray to 3D Blu-ray Ripper

Click the "Folder" icon on the top menu bar to load your 3D Blu-ray disc on Mac OS X El Capitan to the program.


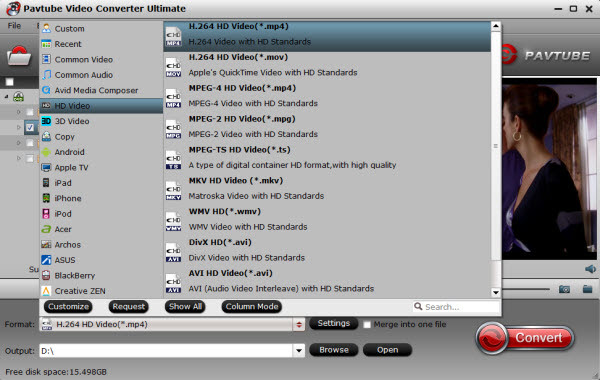
Step 2: Choose the output format and file

Move mouse down, tap” format” button and there is a bar in which you can hunt the choice of “copy”. There are two choices in “Copy”, just choose “Directly Copy For 3D Blu-ray” to copy your 3D Blu-ray main title in 3D effect on Mac OS X El Capitan.


Step 3: start the copy process

After all your settings, what you need to do in the end is to click the big red “convert” to get the copy process started.

This way of copying 3D Blu-ray main title in 3D effect on Mac OS X El Capitan guarantees 1:1 main movie copy in 3D effect without losing quality and it can provide complete and intact main content.


Using ByteCopy to backup 3D Blu-ray main title in 3D effect on Mac OS X El Capitan

Pavtube ByteCopy for Mac is an intuitive and insanely fast 3D Blu-ray main title in 3D effect copying tool on Mac OS X El Capitan. With it, you can effortlessly achieve all your multimedia demands on Mac and enjoy 3D Blu-ray movies anytime you like without worrying damage of 3D Blu-ray disc. You can keep original video quality and meanwhile convert the Blu-ray audio to Dolby Digital 5.1 audio. It provides Lossless MKV file for you from ripping 3D Blu-ray on OS X El Capitan and has wide range of output formats, like H.265, M3U8, MP4, AVI, MOV, M4V, etc.

Windows Free download and install: 


Other Download:
- Pavtube old official address: http://www.pavtube.cn/bytecopy/
- Cnet Download: http://download.cnet.com/Pavtube-ByteCopy/3000-7970_4-76158512.html

Step 1: Load 3D Blu-ray Disc.

From "File" drop-down menu, select "Load from Disc" to import 3D Blu-ray disc on Mac OS X El Capitan from the optical drive.


Step 2: Define output file format.

From "Format" drop-down panel, you can specify "Copy" > "Directly Copy For 3D Blu-ray" to rip 3D Blu-ray on Mac OS X El Capitan preserving 3D effect.


Step 3: Start copy 3D Blu-ray main title in 3D effect to OS X El Capitan

After above all steps, Click the red button “Convert” on the main interface to start conversion.

Actually, ByteCopy is also a professional DVD Ripper on Mac OS X El Capitan. With it, you could backup DVD on Mac OS X El Capitan.

With these two excellent 3D Blu-ray Rippers on Mac OS X El Capitan, you can easily copy your 3D Blu-ray main title in 3D effect on Mac OS X El Capitan and don’t need to worry the problem of compatibility.

Related Articles: 
Source: http://movietopix.jimdo.com/2015/07/15/copy-3d-blu-ray-in-3d-on-el-capitan/ 

Monday, November 7, 2016

Watch MPEG Movies to iMovie on Mac with Smoothly

MPEG information: 

MPEG is actually a group, fully named as Moving Picture Experts Group, which is formed by ISO and IEC to set standards for audio and video compression and transmission. There are several different MPEG standards. Among those standards, MPEG-1, MPEG-2, MPEG-3 and MPEG-4 are very common ones. There are many different types, classes, and parts of the MPEG format. As a matter of fact, its development still continues until today. However, despite all such developments, MPEG-4 remains to be the most preferred video file format for movies that are stored on drives and played on discs. 

Have problem with importing MPEG videos from your camera into iMovie for further editing? Or may you have some MPEG files stored on your Mac and want to use them on iMovie? 

In fact, iMovie generally can recognize MPEG files. Take a loot at iMovie supported formats: 


However, if your MPEG files are muxed (multiplexed) MPEG-1 or MPEG-2 videos, iMovie won’t accept them because of the codec incompatibility. On this occasion, you need to convert MPEG format to iMovie compatible formats like MP4, MOV, M4V, etc. 

Best MPEG to iMovie workflow: 

As you see, iMovie only support some MPEG files. So you'd better convert your MPEG files to iMovie accepted files at first like MOV. If you temporarily have no idea about what to do, you can take the MPG to iMovie Mac conversion into consideration which is introduced in the following paragraphs. The conversion is darn easy to be finished with only three clicks without loss of video quality. 

Pavtube HD Video Converter for Mac, an easy-to-use yet powerful app which can effortlessly encode SD/HD/4K MP4 files to iMovie best editable format, which ensures best results when working with iMovie (11) on Mac(macOS Sierra included). The Mac video conversion tool can also create files compatible with other non-linear editing systems like Adobe Premiere Pro, Avid Media Composer, FCP, etc. Just download the program and follow the step-by-step guide to make your MPEG files compatible with iMovie (11).


Pavtube HD Video Converter for Mac
  • Best Tool to Convert MPG/MPEG to iMovie Compatible Formats for Editing.
  • Convert MPG/MPEG files to iMovie supported format within seconds.
  • Convert SD/HD/4K MP4, MKV, H.265, MOV, AVI, Tivo, MXF, MTS, M2TS, etc to iMovie format.
  • Support to convert MPG/MPEG to iMovie, FCE, FCP, Premiere Pro, Avid Media Composer formats.
  • Edit MPEG video including merge/crop/cut/trim/split/add Watermark/add subtitle to MPEG
  • Perfectly compatible with macOS Sierra, Mac OS X 10.11 El Capitan, Mac OS X 10.10 Yosemite, 10.9 Mavericks, 10.8 Mountain Lion, 10.7 Lion, 10.6 Snow Leopard, 10.5 Leopard.


Hot search: MXF to iMovie ǀ MP4 to iMovie ǀ H.264 to iMovie ǀ MKV to iMovie ǀ YouTube to iMovie ǀ iMovie to MP4

Easy solution to convert MPEG files to iMovie (11)

Step 1: Load MPEG files to the program

Launch the MPEG to iMovie Converter and click "Add video" button to locate the .MPEG file(s) you want to add. Check the "Merge into one file" box, you can join several .mp4 clips together if necessary.


Step 2: Choose iMovie preferred format

Click "Format" pull down list to select iMovie and Final Cut Express > Apple InterMediate Codec(AIC) (*.mov) as the best video format for iMovie (11).


Step 3: Edit the MPEG videos (Optional)

By clicking "Edit selected task" button, you can trim, crop the video, or add watermark, adjust effect, attaching subtitles for pre-editing your video files so that you can simplify your iMovie editing.


Trim – Choose to reserve the part you need. Just choose the chapter which you need to trim, to set "start time" or "end time", type the portion which you want to save.

Crop – Remove black edges of your video or just get the scale of this video you want.

Effect – Adjust the effects by adjusting the parameters, such as:

1) Deinterlacing – If there are some stripes on the picture, you can check this option to make a better picture effect. (Checked by default)

2) Under Effect tab, you can add special effects like Simple Gauss Blur, Flip Color, Invert, Aged Film to your source video. In Color Control section, you can correct color by adjusting brightness, contrast, and saturation.

Audio Editor – You can replace/remove original audio, and set audio fade in/out effects.

Subtitle – You can add *.srt or *.ass/*.ssa subtitles to the video as hard subtitles.

Step 4: Adjust the video, audio settings (Optional)

Click "Settings" to fix the frame rate, bitrate, video size, etc to your needs. To have a smooth editing with iMovie, you need create the files with the appropriate resolution and frame rate that matches your source footage.

Step 4: Start MPEG to iMovie conversion

Click "Start conversion" button at the bottom right corner to finish endocing MPEG to AIC .mov for iMovie (11) on Mac. After the conversion, click "Open" to locate the encoded videos and then launch iMovie,choose File > Import > Movies..., to import the converted MPEG video into iMovie; prepare for editing. You will find that it's just a piece of cake to edit MPEG files in iMovie (11).


Other Download:
Related Articles:  Source: http://file-editing-tips.over-blog.com/2016/09/import-mpeg-to-imovie 

Thursday, November 3, 2016

Convert MKV to Camtasia Studio on Mac

MKV to Camtasia Studio - Loading MKV to Camtasia Studio on MacCamtasia Studio is professional screen recording and video editing software, it can capture any screen movements and actions, including image, audio, cursor, etc and can directly edit the recorded file, including adding various labels, media library, pan-and-zoom, PIP, voiceover, subtitle effects, etc. We may choose the generally used Camtasia Studio (7, 8) to merge, split, trim, crop, edit and create MKV videos. When we want to edit our MKV videos through Camtasia, it fails. Why? Because Camtasia and many other video editing programs do not support MKV format as the input. What are we supposed to do then? 


Camtasia Studio supported formats: 

Camtasia supports AVI, .WMV, MPEG-1, .MP3, .WAV, .WMA, and .MOV (QuickTime) files. It does not support MKV, AVCHD files (.m2ts, .mts, and .m2t), Video_TS, MPEG-2, MOD, Ogg, WebM, .RM (RealPlayer), .FLV (Flash Video), 3GPP, and SWF created outside Techsmith products. It means that those videos incompatible cannot be imported to Camtasia Studio directly and must be converted or re-recorded. 

As you seen, Camtasia Studio does not support MKV format. So in order to make a highlight video out of MKV video files, we have to turn to an excellent video converter or codec for help. Here we recommend Pavtube HD Video Converter for Mac which is not only able to convert MKV to Camtasia videos, but also convert MTS/M2TS, MXF, MP4, H.265, VOB etc to Camtasia Studio format. What’s more, this Mac MKV to Camtasia Studio Converte can also help users to transcode MKV to FCP, iMovie, Adobe Premiere Pro with the optimal presets including Apple ProRes, Apple InterMediate Codec, MPEG-2 etc for your easy editing. (read review

Now follow the step by step guide set out below to convert MKV to Camtasia Studio editable format. 

Dwnload the best MKV to Camtasia Studio converter for Mac: 


Other Download: 

PS: Windows version - Pavtube HD Video Converter 

Download the best MKV to Camtasia Studio converter for Windows: 


Transcode MKV to Camtasia Studio for editing on Mac (Windows steps are smae with Mac) 

Step 1. Now you can click on “Add” button to import MKV files which you want to convert into this program. 


Step 2. Choose MOV as output format > Click Format to choose “Common Video -> MOV – QuickTime (*.mov)” profile in the drop-down menu. 


Tips. Set advanced settings > By clicking the Settings icon, you can adjust video and audio parameters like codec, bit rate, frame rate, sample rate, etc., in that way, you can take charge of the size and quality of the output files. 

Step 4. As soon as all the above settings are completed, you can press “Convert” button to start conversion. You can follow the conversion process via the pop-up windows. 

After conversion is done, simply click “Completed” to back to main interface, and click “Open” button to find generated MOV videos. Afterwards, you can transfer the converted MKV clips into Camtasia studio 8/7/6 for editing smoothly on Mac(macOS Sierra/El Capitan included) with ease. 
Now you may successfully edit your any MKV videos in Camtasia Studio without the annoying problems. 

Read Guides: 

Related Software: 

Pavtube Video Converter for Mac is blazing professional video conversion software, enabling you to convert any video formats like H.265, MP4, MOV, MTS, M2TS, TS, MPEG, FLV, AVI, MKV and more 300+ formats or YouTube/Vimeo/Facebook video, to 4K/HD 1080P video. It possesses high compatibility with portable iPhone, iPad, Apple TV, QuickTime, etc. 

Source: http://pc-mac-compatibility-issues.blogspot.com/2016/08/load-mkv-to-camtasia-studio.html

Tuesday, November 1, 2016

Playback capability on my DS415+ running Plex

Plex Movie StreamingJust for fun, I wanted to try out h.265 playback capabilities on my DS415+ running Plex. And no, 1080p/AAC@~8.5Mbps overloads the CPU when transcoding to my iPhone over wifi. 720p/AAC@~3.5Mbps actually seems to work even if the CPU is very busy. Guess we might have to stick with h.264 for now. Any solution? 


Comparable to the precious H.264 standard, H.265 is more network-friendly for lower bandwidth needed to play videos at the same level of quality, which means that it probable to watch full HD movies/videos online more smoothly. In addition, a H.265 encoded video takes up less space, making it more suitable to be saved on devices with limited storage. To play H.265/HEVC videos on DS415+ running Plex easily, a necessary tool seems to be a H.265 Converter. 

Read some other users’ feedback online, I found Pavtube Video Converter Ultimate is the highly recommended for transcoding H.265 from NX1 or other H.265 video source for DS415+/Plex. 

It is one of the firsts to provide an H.265 encoder/decoder for Windows and it ranks top on the H.265 converter application list. It is an all-in-one H.265 decoder, encoder, converter and player. With it, you can convert H.265 to H.264 MP4, MOV, WMV, AVI, MPG, FLV, M4V as DS415+/Plex supported formats as with several mouse clicks as well as create H.265 video from non-H.265 videos. Besides, optimal presets for NLEs likeAdobe Premiere Pro, Avid Media Composer, Sony Vegas Pro, After Effects and portable devices like Apple TV, Samsung phones or Windows tablets are provided to help you have smooth H.265 video playing & editing workflow. 

Download the H.265 converter: 


Tutorial: Convert H.265 Video to store on DS415+ for streaming to various devices with Plex 


STEP 1. Add H.265 videos 

Run H.265 Converter program, go to the menu bar, select “Add Video” button to select the H.265 files you want to import. You can also directly drag the video files to the program for conversion. It supports batch conversion so you can import multiple files at a time. 


STEP 2. Choose an output format you want 

Click on “Format” bar, select any format you need from the drop-down profile list. You can choose regular video formats like MP4, MOV, AVI, MKV, etc. from Common Video. Or choose format from “HD Video” to get 1080p output. If you would like to enjoy movies from DS415+ to your mobile phone and tablet like iPad, you can select a decent format like “iPad > iPad HD Video(*.mp4)” from the profile list comes with the software. 


Tip: 

1. Before conversion, you can go to the “Settings” to set the parameters for your movie. To compress the file size, adjust the parameters to be smaller. 

2. Click Edit button and you can trim, crop or adjust the video with the built-in video editor to get the very part and effect of yoru original H.265 video as you want. 

STEP 3: Start H.265 video conversion 

When everything is done, click Convert icon to start transcoding H.265 files. Once you’ve liberated your movie library on DS415+, you’ll make it available for viewing on iPad Air orHDTV anytime, anywhere by streaming via Plex. Enjoy. 

Tuesday, October 25, 2016

Converter Samsung NX500 4K H.265 to Premiere Pro CC on Mac

There’s no doubt nonlinear editors will eventually support the H.265 codec. If you’re planning to edit Samsung NX500 4K H.265 footages with Premiere Pro CC 2015.3, you may have to convert your Samsung NX500 4K H.265 video to a useable codec like MPEG-2 for Premiere Pro CC 2015.3 before you can import and edit your footage. 

In this article we will explain how to convert Samsung NX500 H.265 files using a best 4K H.265 to Premiere Pro CC video software and show you how you can set up a 4K timeline in Adobe Premiere Pro CC 2015.3 and export it. Our apologies to Final Cut users, we’ve been Premiere-based for quite a while, but you can still use this article to convert 4K H.265 video. This workflow can also apply to other Samsung cameras that use the H.265 HEVC codec like the NX. Below this step by step guide is a video to help guide you. 

First download the Pavtube HD Video Converter for Mac 

Why Choose Pavtube HD Video Converter for Mac to convert 4K H.265 to Premiere Pro CC 2015.3? 

1. Pavtube HD Video Converter for Mac can convert Samsung NX500 4K H.265 to Premiere Pro CC 2015.3 best editable format on El Capitan/macOS Sierra. 
2. Pavtube HD Video Converter for Mac can convert any SD/HD/4K video including H.265, MP4, MKV, AVI, MOVMXFMTS, M2TS and 250+ formats to Premiere Pro CC 2015.3 and all Premiere versions. 
3. Pavtube HD Video Converter for Mac can be the best H.265 encoder - transcode H.265 to FCP X, FCP 6/7, FCE, iMovie, Apple Aperture 3, Avid Media Composer, Adobe Premiere Pro CC, Premiere Pro CS6/5/4/3, Adobe After Effects CC, After Effects CS6, Adobe Premiere Elements 13/12, Adobe Creative Suite 6/5, DaVinci ResolveCyberlink Powerdirector, and more editors best editabel formats. 
4. Pavtube HD Video Converter for Mac provide you basic video editing functions: split, merge, trim, crop, add watermark, adjust video effect, edit audio and insert subtitles. 
5 .Batch conversion and super fast conversion speed 
6. Regular updates provided for registered users without extra charge for lifetime 

If you are a Windows user, just get Pavtube HD Video Converter to adjust Samsung NX500 4K H.265 to Premiere Pro CC 2015.3 format on Windows 10. 


Other Download:

3 Steps to Encode Samsung NX500 4K H.265 to Premiere Pro CC 2015.3 on Mac 

Step 1: Run best H.265 to Premiere Video Converter. Click ‘Files’ to add H.265/HEVC media files. 


Step 2. Click "Format" bar to choose the output format. Click and choose "Adobe Premiere/Sony Vegas" > "MEPG-2(*.mpg)". The setting seamlessly fits Premiere Pro CC 2015.3 or Premiere Pro CS4/CS5/CS3/CS6 and CC. 


Step 3. Finally, hit the "Convert" button at the bottom right corner and the conversion from 4K H.265 to Adobe Premiere Pro will begin immediately on your Mac. 

Tips: If you have some other video editing issues, you can get the solution from this page

Read More:

Source: http://handycameratips.jimdo.com/2016/08/18/convert-nx500-4k-h265-to-premiere-pro-cc/ 

Thursday, October 20, 2016

Convert Sony A6300 4K XAVC S with Pinnacle Studio Smoothly

Summary:Pinnacle Studio, is a video editing program to let you create Video CD, DVD-Video, AVCHD or Blu-ray format. 

Add complementary menus and burn them to disc, at will. The biggest drawback of Pinnacle Studio is it is only compatible with Windows and iOS. That means it doesn't have Mac version. Meet problem while loading Sony A6300 4K XAVC S files to Pinnacle Studio 17/16/15/14? This article talks about how to get Pinnacle Studio work with Sony A6300 4K XAVC S Files beautifully. Follow up.

Here we list the input formats of Pinnacle Studio: 

Import Formats 

Video: MVC, AVCHD, DV, HDV, AVI, MPEG-1/-2/-4, DivX, Flash, 3GP (MPEG-4, H.263), WMV, Non-encrypted DVD titles (incl. DVD-VR/+VR), QuickTime (DV, MJPEG, MPEG-4, H.264), DivX Plus MKV

Audio: MP3, MPA, M4A, WAV, AMR, AC3, AAC, Vorbis, WMA

Solution to Get Pinnacle Studio work with Sony A6300 4K XAVC S nicely

If you want to import the incompatible Sony A6300 4K XAVC S videos into Pinnacle Studio 16/15/14, you have to convert or re-record them into one of Pinnacle Studio supporting formats, like AVI, MPEG-2 or WMV formats first. When doing Pinnacle Studio conversion, you will need a Pinnacle Studio Video Converter.

How to Choose the Best Pinnacle Studio Video Converter?

There are many video converters in the market, what are the standards of judging a qualified one for editing in Pinnacle Studio?

1. Supporting SD/HD/4K videos fully
2. Supporting a wide range of input and output formats
3. Adjusting aspect ratio automatically or manually
4. Don't-Make-Me-Think design with ready-made output profiles
5. No. 1 fast video converting speed

Here Pavtube Video Converter is just the recommeded option for its powerful functions. It can wander freely between all kinds of video formats, and make the converted files be accepted by diverse video editing tools including Pinnacle Studio, Sony Vegas, Windows Movie Maker, PowerDirector, etc. and playing software/applications. If you are a Mac user, you can get Pavtube Video Converter for Mac.

It supports: 

4K or HD Input 

1. Panasonic & Canon HD camcorder Video, JVC HD camcorder Video (*.mod, *.tod), Sony HD camcorder Video (*.mts, *.m2ts);
2. 4K (AVC code, .mp4 file extension) videos from YouTube 4K channel;
3. Video recorded by Apple iPhone 6/6s (Plus)/7, Motorola Nexus 6, Samsung Galaxy Alpha/Note 4/Note 5/S6, Sony Xperia Z4/Z5 (Compact), LG G Pro2/G3, Acer Liquid S2, Oppo Find 7/7a, Lenovo vibe Z2, OnePlus One, etc

Various Output Formats 

1. HD videos: TS HD, MTS, MOV HD, AVC HD, MKV HD, MPEG HD, AVI HD, WMV HD
2. PC/Mac general: MP4, AVC, AVI, WMV, HEVC/H.265, MKV, MPEG1, MPEG2, RM, 3G2, 3GP, ASF, WEBM (VP8), FLV, F4V, SWF, DV, MOV, M4V
3. Devices: All from Apple, Android, Microsoft, Sony, etc.
4. Audio formats: MP3, AAC, AC3, WMA, AIFF, CAF, DTS, OGG, AU, RA, WAV, FLAC, ALAC

What's more, it offers clutter-free design which can meet the requirements of both beginners and experts. You can either choose the ready-made output Adobe Premiere/Sony Veags profile directly for Pinnacle Studio or make advanced and detailed adjustment by yourself, such as, to balance the video quality and the file size.

With the support for NVIDIA CUDA and ATI Stream (AMD APP) acceleration technologies, the conversion speed is maximally improved. Plus, with the built-in video editor, you can also choose to trim, crop, add watermark to your original videos. You are welcome to follow the step-by-step guide to convert Sony A6300 4K XAVC S to formats that are compatible with Pinnacle Studio file on Windows PC.

Hot search: 
Free download the best 4K XAVC S to Pinnacle Studio video converter:


Other Download:
- Pavtube old official address: http://www.pavtube.com/video_converter/
- Amazon Download: http://download.cnet.com/Pavtube-Video-Converter/3000-2194_4-75734821.html
- Cnet Download: http://download.cnet.com/Pavtube-Video-Converter/3000-2194_4-75734821.html

Simple Guide to Convert incompatible videos to MPEG-2 for Pinnacle Studio 

Step 1: Add Files

Click "Add video" button to browse for and select the file you want to convert for Pinnacle Studio . Alternatively, drag & drop source videos to the project area. If you want to combine several files into one for better enjoyment, you can choose "Merge into one file" option.


Step 2: Edit or Create (Optional)

It's an optional step that allows you to edit source vidos. You are allowed to customize your videos or even create your own videos as you desire by clicking "Edit selected task". The converter comes with all regular video editing tools like Trim, Crop, Effect, Subtitle, Watermark. For basic video editing tasks, you can even replace your Pinnacle Studio with it.

Step 3: Set Pinnacle Studio -friendly video format

Click "Format" drop-down box, and then choose "MPEG-2 (*.mpg)" from "Adobe Premiere/Sony Vegas" category. Or Choose the AVI format which is also suitable for Pinnacle Studio.


Step 3. Start conversion

After all the necessary settings, hit the "Convert" button at the bottom right corner. Now your 4K XAVC S video files will be converted into AVI which are ready to be imported into Pinnacle Studio smoothly without hassle. After conversion, you can get the generated files under "Open" panel to get the generated files for loading in Pinnacle Studio 17/16/15/14 perfectly.

Related Articles: 
Source:http://mediaconverting.blogspot.com/2016/07/edit-sony-a6300-4k-xavc-s-with-pinnacle-studio.html 

Tuesday, October 18, 2016

Convert H.265/HEVC Recordings From Some 4K HD Camcorders

Summary:Then you must be a professional videographer who has high requirements of the output footage, right?

For further dispose with some Windows NELs, such like the typical one, After Effects, haven’t you ever met some incompatible troubles? Import H.265/HEVC videos to After Effects? I guess we must need some video assistant because the current AE version cannot support the H.265 codec well, right? 


Tips: Not only for After Effects, but also for Adobe Premiere proSony Vegas or even Avid Media Composer, etc, H.265, as the newest codec, has not been accepted by these guys yet. 

H.265/HEVC—the newest codec that can bring us much than H.264 

This is an unexpected but potentially path-breaking announcement. It will take several weeks or months to confirm just what advantages or virtues it offers. Presently, I’m not sure what CPU requirements will be to edit or play h.265. The Cyberlink PowerDirector editing product may already support some h.265, or it will shortly. But I know of no tests. Do you wanna get closer to H.265 transcoder? 

To make H.265/HEVC friendly with After Effects, Pavtube H.265 Converter can do you a favor. If you have focused on the Pavtube studio, you won’t miss the recent upgrade version 4.8.2.0 of Pavtube Windows products. This upgraded version is specially designed for the latest codec H.265/HEVC. Cannot import H.265/HEVC recordings to After Effects? Just drop the related worries away! 

Windows operation system supported: Windows 10, Windows 8, Windows 7, Windows XP, Windows Vista, and Windows 2000. 

Let’s see how does this H.265 to After Effects Converter for us: 

Stp1.Download and install the program on our computer as soon as you get into the main interface. Directly drag your files in is not a bad idea. Or here we got other effective ways. Click the ‘Add Video’ icon on the left corner, we can import the source files individually. ‘Add from folder’ is offered for you to load your files in a complete folder. 


Step 2. Cause the new version of this H.265 encoder can accept the HEVC files smoothly, it would be easier to load them in. So next for choosing suitable output for After Effect. Just drop down the output list, we suggest you to select the ‘Adobe Premiere Pro/Sony Vegas’>>’MPEG-2 (*.mpg)’ as the best one. 


Notes: Form other common ones to H.265/HEVC for output? Also you can find the item you want o the output list. ‘HD Video’>>’H.265 HD Video’ is waiting there for you! Much more time it will cost you if you choose this one as your favorite. 

Step 3(Optional) Set your output videos in your own style? Let’s come to the ‘Settings’ interface to see how. To keep the original quality when editing in After Effects, why not adjust the video bitrates and frame rate as default? You will find it will be more suitable for your editing. 


From H.265/HEVC to MPEG-2 mpg for a further dispose in After Effects, this H.265 Video Converter did us a big favor with such easy operations. Go back to the main interface, just press on the ‘Convert’ button to finish the preparation work and get started. 

See Also: 
Source: http://mts-to-aic-converter.com/edit-h-265-files-in-after-effects/